
Step-by-Step Process of Head Gasket Repair by Industry Experts
Introduction to Head Gasket Repair
If you're facing issues with your vehicle's head gasket, understanding the basics of head gasket repair can help you make informed decisions. Head gasket repair involves replacing the gasket that seals the engine cylinders to prevent leaks. This repair is crucial to maintaining your car's performance and preventing costly engine damage. In our upcoming posts, we will guide you through the step-by-step process of head gasket repair, ensuring you grasp the essentials of this vital maintenance task. Stay tuned for expert insights on how to address head gasket problems effectively.
Signs of a Faulty Head Gasket
Look out for signs like white smoke from the exhaust, overheating engine, coolant leaks, milky oil, and bubbles in the radiator. These could indicate a faulty head gasket, which is crucial to address promptly to prevent further damage to your vehicle.
Diagnostic Testing for Head Gasket Issues
If you suspect issues with your head gasket, diagnostic testing is essential. Mechanics can utilize a few methods to diagnose head gasket problems accurately:
Compression Test: This test measures the compression levels in your engine cylinders. Low compression may indicate a head gasket leak.
Coolant System Pressure Test: Mechanics will pressurize the cooling system to check for any drops in pressure, showing a potential head gasket leak.
Exhaust Gas Analysis: By examining the exhaust gases, experts can detect signs of a leaking head gasket, such as high levels of certain chemicals.
Effective diagnostic testing ensures a proper assessment of your head gasket's condition, guiding the subsequent repair steps.
Preparation Before Repair
Industry experts emphasize the importance of preparing before starting a head gasket repair. Here are some key steps to take before diving into the repair process:
Inspect the engine thoroughly to identify the source of the issue.
Gather all the necessary tools and replacement parts.
Ensure the engine is cool before beginning any work to prevent burns.
Disconnect the battery to avoid any electrical accidents during the repair.
Refer to the vehicle's manual for specific instructions tailored to your car model.
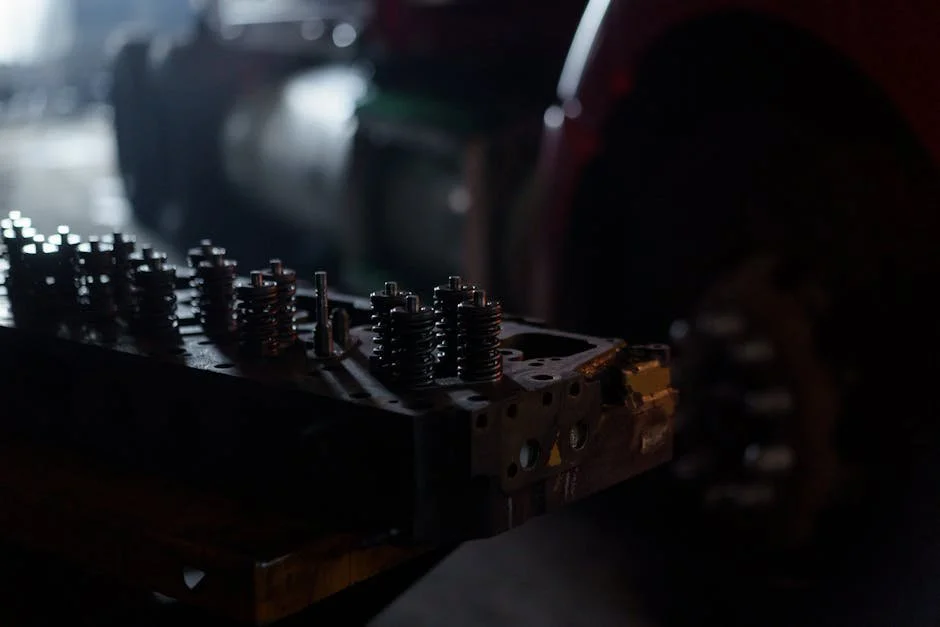
Removing the Damaged Head Gasket
When removing a damaged head gasket, the first step is to diagnose the issue accurately. Here is an overview of the process:
Drain the coolant from the system to prevent spills and leaks.
Remove the engine components to access the head gasket, including the intake manifold, exhaust manifold, and cylinder head.
Inspect the cylinder head for any damage or warping that may have been caused by the blown head gasket.
Replace the damaged head gasket with a new one, ensuring a proper seal to prevent future issues.
Remember, this task requires precision and attention to detail to ensure the repair is done correctly.
Inspecting and Cleaning Components
Before repairing a head gasket, industry experts first inspect and clean the components to ensure they are in good condition. This step is crucial in diagnosing any issues and preparing the engine for repair. The inspection involves checking for any signs of damage or wear on the gasket, cylinder head, and engine block. Cleaning the components involves removing any residue or contaminants that could affect the repair process. By thoroughly inspecting and cleaning these components, experts can accurately assess the extent of the damage and proceed with the necessary repairs.
Installing the New Head Gasket
Industry experts stress the importance of precision when installing a new head gasket. Here are the key steps involved:
Clean the engine block and cylinder head thoroughly to ensure a proper seal.
Apply a thin, even layer of gasket sealer to both surfaces before placing the new gasket.
Carefully position the gasket in place, ensuring it aligns correctly with the engine block and cylinder head.
Secure the cylinder head back into position using the correct torque specifications for each bolt.
Double-check all connections and components before starting the engine to prevent any issues.
Reassembling the Engine
To reassemble the engine after a head gasket repair, start by placing the cleaned cylinder head back onto the engine block. Use a torque wrench to tighten the head bolts gradually in a cross pattern to ensure even pressure distribution. Next, reconnect all the engine components such as the intake and exhaust manifolds, timing belt or chain, and spark plugs. Make sure all connections are secure and aligned correctly to avoid any issues. Double-check all steps to ensure a proper reassembly before starting the engine to prevent potential damage.
Testing the Repair
After the head gasket repair is completed, the next step is testing the repair to ensure it was successful. Tests may include a pressure test to check for leaks, a compression test to verify the engine's compression levels, and a test drive to ensure the engine runs smoothly. Testing the repair is crucial to ensure the head gasket is properly sealed and the engine functions as it should.
Maintenance Tips for a Healthy Head Gasket
To keep your head gasket healthy and avoid costly repairs, it's essential to maintain your vehicle properly. Follow these tips from industry experts:
Regularly check your vehicle's coolant levels to prevent overheating, which can damage the head gasket.
Ensure proper tightening of the cylinder head bolts to prevent leaks and maintain compression.
Use a high-quality coolant to protect the gasket from corrosion and maintain optimal engine temperature.
Get your vehicle inspected at the first sign of a head gasket issue, such as white smoke from the exhaust or coolant leaks.
Take care of your head gasket to ensure the longevity and performance of your vehicle.